Physics is a branch of science that mainly deals with the study of the phenomena naturally existing in the universe. To get a better understanding of the laws of nature, physicists keep themselves regularly engaged in various experiments. Interestingly, there are certain experiments and activities that one can perform easily at home to verify the existence and righteousness of various laws of the universe. Some of the basic physics project ideas are given below:
1. Balloon Car
A balloon car is one of the simplest physics project that one can make at home with the help of easily available objects. The main items required to make a balloon car include one plastic bottle, two straws, four bottle caps, one balloon, and glue. First of all, place the bottle horizontally on the table and make two pairs of grooves on the curved surface of the bottle near the opening and the base. Cut a straw in half, insert both the straw pieces into the pair of grooves. Attach four bottle caps to the ends of the straws with the help of glue. Make a grooving on the top of the plastic bottle and fix a straw in the hole in such a way that a portion of straw is present on the top, while the rest part of the straw lies inside the bottle. Attach an inflated balloon to the end of the straw that is present on the top of the bottle. When the air escaping the balloon creates air pressure on the surface, the structure tends to move forward. From this particular project, one can easily learn about air pressure, state of the matter, rotatory motion, linear motion, conversion of motion from one form to another, and various other physical parameters.

Balloon Car
2. Catapult
A catapult is yet another simple project that one can easily make at home. To make a catapult, you need ice cream sticks, rubber bands, a bottle cap, and glue. First of all, build a stack of five ice cream sticks. Tie a rubber band on each end of the stack. Make sure that the rubber bands are properly tied and the sticks do not move. Now, take two more ice cream sticks. Place one of them on the top of the other to form a stack and attach a rubber band on one side of the stack. Slide the stack of five ice cream sticks between the stack of two ice-cream sticks. Wrap rubber band on the intersection point of the stacks to hold the catapult in place. Fix a bottle cap on the top stick with the help of glue. The catapult is ready. Place the projectile in the bottle cap, slightly push the topmost stick downwards, aim for the target, and release. It provides the user with the opportunity to learn about elasticity, tension, action-reaction force, projectile motion, and various other phenomena existing in nature.

Catapult
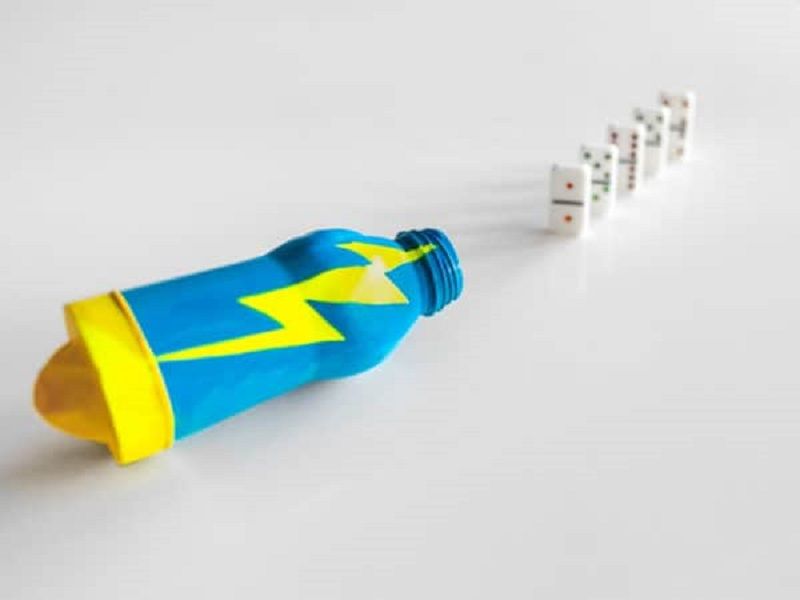
3. Homemade Rocket
To make a homemade rocket physics project, you need an empty plastic bottle, vinegar, baking soda, three pencils, tape, a pair of scissors, and a cork. To make the structure of the rocket, attach the three pencils to the curved portion of the bottle near the top part. Make sure the pencils are placed at equal distances from each other in such a way that when the bottle is placed upside down on the ground, the mouth of the bottle does not touch the floor. The pencils should provide a rigid and stable launching pad for the model rocket. Pour some vinegar into the empty plastic bottle then add baking soda powder to it with the help of a funnel. Quickly use the cork to seal the bottle tight. Place the model rocket on the ground, move away, and observe the launch. This project helps the user understand the basic kinematics of a rocket, the chemical reaction of baking soda and vinegar, and the projectile motion of objects.

Homemade Rocket
4. Baking Soda Volcano
Displaying the volcanic eruption with the help of baking soda is a popular science experiment that involves a simple set of steps. To make a baking soda volcano at home, you require dish soap, water, food colouring, white vinegar, baking soda, and a plastic bottle. First of all, make the baking soda slurry by properly mixing a portion of baking soda with an equal part of water. Now, add water, vinegar, dish soap, and a few drops of food colouring into the plastic bottle. Pour the baking soda slurry into the bottle containing the mixture. Move a few steps back and observe the volcanic eruption from a distance. The chemical eruption occurs due to a chemical reaction between the vinegar and baking soda that produces carbon dioxide gas. Carbon dioxide gas tends to spread in the surroundings because it is comparatively heavy than the other gases present in the atmosphere; however, due to the confined area of the plastic bottle, it tends to cause an eruption.

Baking Soda Volcano
5. Fountain
To make a fountain as a physics project, you require plastic containers, wooden blocks, vinyl tubing, water pump, power supply, drill machine, pebbles, stones, miniature plants, cutter, and glue. Form the base of the fountain as per your choice with the help of wooden blocks. Drill a hole at the base of one of the plastic containers and another hole on the side of the other plastic container. Pass the vinyl tubing through both holes. Glue the tube around the joints and holes. Place the containers into the wooden structure of the fountain in such a way that one of the containers is present at a height more as compared to the other container. Make a hole on the front side of the container present above the base container. Attach a small water pump at the end of the tube and connect it to the power supply. Decorate the structure with the help of pebbles, stones, paint, miniature plants, etc. Pour water into the containers and observe the water flowing just like a fountain in a miniature pond. This project would help the users understand the flow of fluids, the working of a water pump, potential energy, and kinetic energy.

Fountain
6. Newton’s Cradle
Newton’s cradle is one of the most interesting structures that demonstrate the law of conservation of energy and momentum in the easiest way. To make Newton’s cradle at home for your physics project, you need ice cream sticks, a glue stick or glue gun, marbles, string, a pair of scissors, tape, and a pencil. Glue eight ice cream sticks end to end and form two separate square-shaped structures. Attach these two squares to each other with the help of four ice cream sticks in such a way that the resultant structure is shaped like a cube. Cut the string into eight equal-length pieces. Keep the length of each string approximately equal to 8 inches. Attach marbles to the centre of each piece of the string with the help of glue or a hot glue gun. Mark 6 equally spaced points on the top two parallel ice cream sticks of the cube. Place the ends of the strings on the marks and apply tape on them. Allow the marbles to hang in between. Newton cradle physics project is ready to demonstrate momentum and prove the existence of the law of conservation of energy in real life.

Newton’s Cradle
7. Balancing Scale
A balancing scale is a prominent physics project that is capable of demonstrating weight, gravity, equilibrium, and various other concepts. To make a traditional weighing scale at home, one would need two identical paper plates, string, pencil, tape, glue, a pair of scissors, and a cloth hanger. Punch three holes in both the paper plates. Make sure the holes are close to the outer boundary of the plates. Cut out six pieces of string that are equal in length. The length of each string should be approximately equal to 2 ft. Attach one end of each string to the individual holes punched in the plates. Hold one of the paper plates and take the three strings attached to the holes grooved into it. Properly stretch the strings and tie them together in a single knot. Perform the same procedure with the other plate. Carefully, hang the paper plates on each side of a cloth hanger. Hold the cloth hanger from the hook and begin weighing the objects.

Balancing scale
8. Periscope
A periscope is a device that is used by submarine operators to see the objects above the water surface. To construct a periscope at home, you require two congruent pieces of mirror, cardboard or a PVC pipe, cutter, tape or glue. Use cardboard to make three hollow cuboids and arrange them in the shape of a real periscope. Attach the mirror glasses to the opposite corners of the structure at an angle equal to 45°. Hold one end of the periscope on eye level and look at the distant objects easily. This would help the user understand the working of mirrors and the laws of reflection.

Periscope
9. Visual Doppler
To construct a model that displays the doppler effect in real life, you require two craft papers, a ruler, a pair of scissors, tape or glue, a small toy car, blank paper and pencil or a camera. Firstly, cut out a few five-inch wide strips from the craft paper. The length of the strips should be maintained in such a way that each strip is one inch shorter than the previous one. Tape or glue the ends of the strips together to form loops. Put a toy car in the middle of the second craft paper and arrange the loops around the car in a manner that the loops do not touch each other or the car. Make sure the distance between the loops is the same. Here, the loops represent the sound waves. Take a picture of the arrangement of loops around the car when it is standing still. In case you do not have a camera, draw the impression of the arrangement of loops around the car on blank paper with the help of a pencil. Roll the toy car gently in the forward direction until it touches the loops and pushes them together. The loops present in the front get squished together and demonstrate the high pitch sound, whereas the loops at the back get spread out and tend to display the low pitch sound. Record the position of the loops after the movement of the car with the help of a camera or by drawing an impression of the scene on a blank sheet. This experiment and physical model effectively demonstrates the concept of the Doppler effect, compression, rarefaction, and the nature of sound waves.

Visual Doppler
10. Electric Motor
An electric motor is yet another simple physics project that one can easily build at home. To make a fully functional electric motor, you require a battery, a small piece of magnet, electric wire, two paper clips, electric tape, and a knife. First of all, wrap the electrical wire around a cylindrical object such as a battery about ten to twelve times to form a loop. Now, grab the ends of the wire and tie them across the loop of the wire. Remove the insulation from the ends of the wire. Take two paper clips and stretch one end of each clip. Attach the flat end of the clips to the positive and negative terminals of the battery with the help of electrical tape. Place the loop of wire between the curved ends of the paper clips. The final step is to place the magnet under the loop of the electrical wire. Tape the magnet on the battery to hold it in position. With the help of this particular project, the user would be able to have a better understanding of magnetism, conduction of current, rotatory motion, transfer and transformation of energy, etc.

Electric Motor
11. Compass
Building a compass at home is a prominent idea for a physics project. The materials required to build a simple compass include a sewing needle, knife, cork, magnets, and a bowl filled with water. Firstly, hold the needle and magnetise it. The magnetisation of the needle can be performed easily by stroking it with the help of a piece of magnet 30-40 times along the length. Now, flip the magnet upside down and use it to stroke the needle in a similar manner, but make sure that the magnet is moved linearly in opposite direction. Cut 1-2 cm thick portion of the cork with the help of a knife. Carefully insert the needle in the middle of the cork. The compass is ready to be tested. When the compass is placed in a bowl filled with water, it tends to point towards the North. The physics concepts that one can visualize and understand with the help of this particular project include magnetism, the magnetic field of the earth, magnetic induction, shear force, etc.

Compass
12. Marble Roller Coaster
To make a marble roller coaster, you require a cardboard sheet, chart paper, glue or tape, and marbles. Make a roller coaster pattern full of curves and turns with the help of chart paper. Use the cardboard pieces to elevate the height accordingly. Decorate the set-up as per requirement. Make sure the elevation of the initial or start-up point is higher than the rest of the structure. Place the marble on the start point and roll it down the structure. This project would help the student or the user understand the conversion of potential energy to kinetic energy, curvilinear motion, rectilinear motion, rolling friction, etc.

Marble Roller Coaster
13. Air Blaster
To make an air blaster, one would require a plastic bottle, a knife or cutter, a balloon, and tape or glue. Carefully cut the base of the bottle with the help of a knife or cutter. Now, cut the top portion of the balloon. Stretch the base portion of the balloon and fix it on the base of the bottle with the help of tape. Make sure there is no leakage of air from the sides. Hold the balloon attached to the bottle from the centre, pull it backwards, and release. An air vortex gets formed. Here, the user would be able to understand the working of an air vortex, the elasticity of materials, air pressure, and various other physics-related concepts.
Air Blaster
14. Potato Battery
To make a potato battery, you require a potato, a voltmeter, a galvanized nail, a piece of copper sheet or a copper coin, and two alligator connectors with clips on each end. A potato battery is capable of generating enough energy required to power a clock. Firstly, insert the galvanized nail into the potato. Make sure the potato is large enough and the nail does not go through it completely. An inch away from the nail, stick a copper coin or a piece of a copper sheet into the potato. Connect a voltmeter to the set-up and measure the voltage generated. Attach the black wire of the voltmeter to the galvanized nail and the red or yellow wire of the voltmeter to the coin. With the help of this simple physics project, the user can learn the basics of electricity, the concept of voltage, conversion of energy, etc.

Potato Battery
15. Balloon Hovercraft
To construct a balloon Hovercraft, the essential items required include a CD/DVD, a bottle cap, a balloon, glue or tape, and a pair of scissors. Firstly, groove a small hole right in the middle of the bottle cap. The diameter of the hole should be approximately equal to the diameter of a regular plastic straw. Stick the bottle cap in the centre of the CD/DVD with the help of glue or tape. Inflate the balloon, pinch it from the opening side to hold the air inside, and fix it to the boundary of the bottle cap in such a way that the air present inside the balloon can escape through the hole in the bottle cap easily. This helps the user learn about various physics concepts such as Newton’s second law of motion, air pressure, the force of friction, the analogy of a hovercraft, etc.

Balloon Hovercraft
16. Egg in a Bottle
To construct this particular physics project model, you need a properly boiled and peeled egg, a glass bottle or container that has a narrow opening, paper, and a source of fire. Place the glass bottle on a flat and rigid surface. Light one end of the paper and place it inside the glass container. Now, place the egg on the top of the glass bottle and wait. The egg would get sucked in despite the opening of the container being narrow. The egg in a bottle physics experiment helps the user observe the relationship between atmospheric pressure, the flow of air from a region of high pressure to low pressure, combustion, and temperature.

Egg in a Bottle
17. Growing Crystals
Growing crystals is a physical phenomenon, typically referred to as crystallization, which the state of matter tends to change directly from liquid to solid form. The materials required to grow crystals at home include a glass container, distilled water, salt, a pencil, and a piece of thread. The first step to perform crystallization is to heat the distilled water up to a temperature that is a little below its boiling point. The next step is to partially fill the glass container with hot water and add salt. The quantity of salt added to the water should be enough to create a saturated solution. A saturated solution is formed when the solute is added to the solvent to the point that the solvent is not able to dissolve the solute any further. Make a loop on one end of the string and tie the other end to a pencil. Place the pencil over the container in such a way that the string gets properly immersed into the solution. Put the arrangement in a warm environment. A few days later, crystals begin to deposit on the string. This particular project helps the user get a better understanding of saturated solutions and the conversion of the state of matter from one form into another.
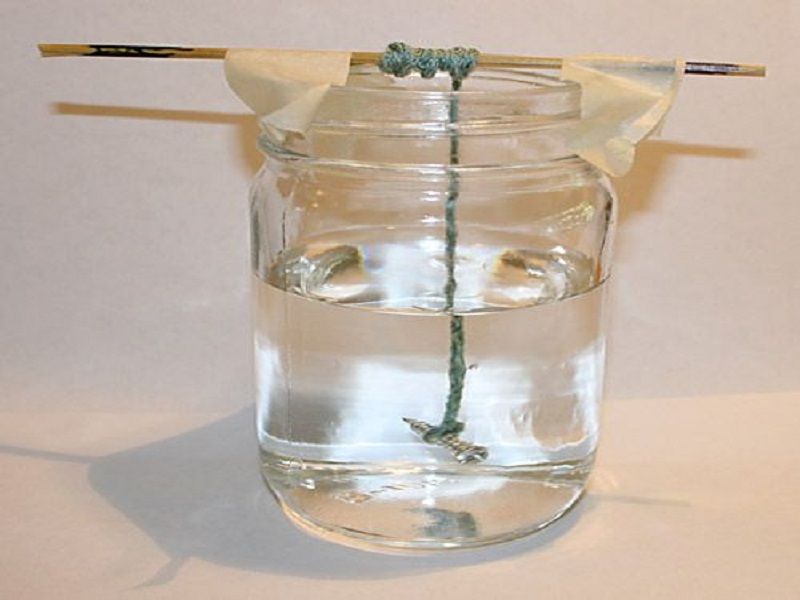
Growing Crystals
18. Prism
To make a prism, the main items required are distilled water and clear gelatin. The first step to constructing a prism is to pour the powdered gelatin into a container and add half portion of distilled water into it. Place the container on a stove and start heating the solution. Periodically stir the solution to properly dissolve gelatin in distilled water. Pour the solution into a small container and allow it to cool. Now, cut the solidified gelatin in the shape of a prism. Shine a light source from one end of the prism and observe the ray of light break into a spectrum of colours. This particular project would let the user gather knowledge about wavelengths of various colours, properties of visible light and other electromagnetic radiation, solidification process, and many more.

Prism
19. Lava Lamp
A lava lamp is yet another simple physics project that one can easily make at home with the help of easily available equipment. The materials required for this particular project include vegetable oil, glass container, food colouring, and salt. Firstly, fill the 3/4th portion of the glass with water and the rest with vegetable oil. Add a few drops of food colouring to the mixture and then slowly pour one teaspoon of salt into the container. Finally, sit back and observe the set-up. Initially, the oil tends to reach the end of the container drop by drop. When the salt properly gets dissolved into the solution, oil begins to slowly rise from the bottom of the container and form a layer on the top of the water, thereby displaying a lava phenomenon. This helps the user understand the viscosity and immiscibility of different fluids.

Lava lamp
20. Half ring Vortex
To make a vortex, you require a circular dish, food colouring, and a pool filled with clear water. First of all, dip the dish into the water and push it in the forward direction. Remove the plate and observe the two rings formed on the surface of the water. Add a few drops of food colouring to one of the rings. Observe that the colour tends to flow from one ring to the other. This indicates that the rings are connected to each other and a half-ring vortex has been formed. By performing this particular physics experiment, the user would be able to understand the construction and properties of a vortex.
21. Archimedes Screw
To make an Archimedes screw, you need a PVC pipe, duct tape, a pair of scissors, food colouring, water, and clear vinyl tubing. First of all, tape one end of the tube to the pipe. Now, wrap the tube along the length of the pipe to form a spiral. Once the tube covers the whole length of the pipe, cut off the extra tubing with the help of scissors. Tape the other end of the tubing to the pipe. Make sure that the space between the loops of the tube is even. Use duct tape to hold the tube in place. Take an empty container and a container filled with water. Set up the containers in such a way that the empty container is placed at a higher position and the filled container is placed at a comparatively lower position. Dip one end of the Archimedes screw in the lower container containing water and align the other end of the screw over the higher container. Rotate the screw and watch the water travel up the tube. For better visualisation, add a few drops of food colouring into the water. With the help of this particular experiment, the user would be able to understand the physics behind water walking, rotatory motion, and the tendency of matter to flow from a region of higher concentration to a region of lower concentration.

Archimedes Screw
22. Electromagnet
To make an electromagnet, you require a battery, an iron nail, a switch, and insulated copper wire. Firstly, take the insulated copper wire and wrap it over the iron nail. Remove the insulation coating of the wire from both ends. Connect one terminal of the switch to one end of the copper wire. Connect a battery between the free ends of the wire and the switch. Now, if you push the switch and move the nail near ferromagnetic materials, the object gets attracted and stick to the nail. The user can learn a lot about electric current, magnetism, magnetic field, ferromagnetic, paramagnetic, and diamagnetic material, etc., with the help of this particular physics project.

Electromagnet
23. Water Strider
To make a water strider, you require a shallow plate, copper wire, water, food colouring, and a pair of scissors. Cut three equal pieces of copper wire of approximately 6 cm in length. Twist the centre portion of the wire pieces together. Curve the ends of the wire pieces. Make sure the twisting of wire is done properly and the structure is properly balanced. Fill the plate with water up to the brim. Place the water strider on the surface of the water and observe it float. The key concepts that users can learn by making a water strider include surface tension, buoyancy, density, and mechanical force.

Water Strider
24. Earthquake Shake Table
An earthquake shake table is typically used in real life by architects and engineers to test if a particular structure or a building would be able to withstand the jerks of an earthquake. To make an earthquake shake table as a physics project, you require a metallic ruler, rubber bands, duct tape, a pair of scissors, two square-shaped plexiglass sheets, and four small rubber balls of the same size. The first step is to cover the corners of both plexiglass sheets with duct tape. Place one of the plexiglass sheets on the top of another. Attach the two glass sheets together by wrapping rubber bands on the opposite sides about 1 inch away from the edge. Insert four rubber balls between the sheets, one ball for each corner. Place an object on the top of the shake table. Pull the top glass sheet and shake the table to check whether the object is able to withstand the vibrations. The key terms and concepts to learn from this particular project include destruction force, vibratory motion, linear motion, earthquake, tectonic plates, seismic waves, seismometer, etc.

Earthquake Shake Table
25. Gauss Rifle
A gauss rifle is also known as a magnetic linear accelerator. The materials required to build a magnetic linear accelerator include two similar wooden dowels, neodymium magnets, nickel-plated steel balls, wood glue, clear tape, sand, plastic box, and measuring tape. Firstly, form a slide with the help of wooden dowels. For this purpose, place the dowels next to each other and tape them together to temporarily hold them in place. Use wood glue to permanently fix the two dowels together. Let the glue dry for some time, and then remove the tape. Now, place two ball bearings on the edge of the dowels, and then put one neodymium magnet next to the balls. Fix the magnet in place with the help of clear tape. Place the arrangement on the edge of the table and a sandbox filled with sand on the floor a few feet away from the table. Place another ball bearing on the other side of the magnet about 5-6 cm away. Roll the ball bearing. You will observe that it gets attracted by the magnet and a transfer of energy from the magnet to the balls present on the edge of the dowels takes place. The ball present on the corner gets launched and falls into the sandbox. Use the measuring tape to measure the distance travelled by the steel ball and repeat the experiment by inducing variations in the distance between the magnet and the balls. This project helps the user understand the laws of conservation of momentum, gravitational force, energy, magnetic field, mass, velocity, acceleration, etc.

Gauss Rifle
26. Line Following Robot
A line following robot is a great idea for a physics project. As the name itself suggests, a line following robot tends to follow a black strip pattern formed on the surface and avoids any other path for movement. To make a line following robot, you require four gear motors, four wheels, Arduino Uno, an infrared sensor, connecting wires, solder, soldering iron, black tape, white chart paper, and battery. Make the connections of the components as per the circuit diagram. Attach the wheels to the output shaft of the gear motors. Connect the terminals of the gear motors to the motor driver. Fix two or more infrared sensors in front of the set-up with the help of glue. Use connecting wires to connect the sensor to the Arduino. Write a program for the line following operation of the robotic vehicle. Attach a USB cable to the USB port of the computer and Arduino board. Now, upload the program. Supply power to the robotic car with the help of a battery. Place the white chart paper on the ground, make tracks on it with the help of black tape. Place the robotic vehicle on the chart paper and observe it move strictly on the black tracks. With the help of this particular project, the user would be able to understand programming, infrared sensors, electric circuits, gear motors, rotatory motion, linear motion, etc.

Line Following Robot
27. Portable Mobile Charger
A portable mobile charger is one of the simplest physics projects. The components and equipment required to build a portable mobile charger are battery, 7805 voltage regulator IC, resistor, PCB board, battery connector, USB port, connecting wire, LED, solder wire, and soldering iron. Make the circuit on the PCB board and connect the electronic components as per the circuit diagram. Here, the voltage regulator IC helps in the generation of a constant magnitude voltage. The main purpose of the LED connected to the output of the circuit is to confirm the working of the charger. Building a portable mobile charger helps the user know about conduction of current, voltage drop, voltage regulation, conversion of electrical energy into light energy, and various other related concepts.

Portable Mobile Charger
28. Magnetic Slime
To make magnetic slime, you require liquid starch, white glue, iron oxide powder, bowl, spoon, measuring cup, and neodymium magnet. The first step to making a magnetic slime is to pour 1/4 portion of white glue in a bowl. Now, add 2 tablespoons of an iron oxide powder to the white glue and mix them well. Fill 1/8th portion of the measuring cup with liquid starch and add it to the mixture. Stir well to form slime. Knead the slime with bare hands. Now, bring a ferromagnetic object near the magnetic slime, the slime tends to get attracted, and covers the object from outside. This particular project demonstrates the magnetic behaviour of objects.

Magnetic Slime
29. Junk Bot
A junk bot is a simple physics project that one can build at home with the help of waste items such as cardboard, plastic straws, ice cream sticks, metal cans, etc. The important tools required to build a junk bot include pliers, motor, screwdriver, battery, battery holder, connecting wires, tape, cork, a pair of scissors, and glue. The first step is to insert the batteries into the battery holder. Then, attach the battery holder terminals to the terminals of the motor. Fix a cork on the shaft of the motor. Turn on the battery’s switch. Check whether the motor and the cork are vibrating. Make the body of the robot with the help of waste items available. Attach the battery and the motor along the length of the robot near the base. Place the robot on the floor, turn on the switch, and observe it moving forward. You can also make two such robots and use them to wrestle against each other for entertainment purposes. This particular physics project would help the user gain knowledge about the basics of robotics, the function of a motor, and the importance of reusing waste materials.

Junk Bot
30. Clap Switch
Clap switch has a basic operation of turning on and off the working of certain gadgets such as the luminance of a light bulb on hearing a clap sound. It typically consists of an assembly of electronic components such as IC- LM555, a battery, battery holder, resistors, transistors, capacitors, microphone, and a light-emitting diode. The tools required for the construction include solder wire, soldering iron, printed circuit board, tweezers, and connecting wires. To begin with, assemble and connect all the components as per the circuit diagram. Use a jumper wire to connect pin number 4 of the LM555 IC to pin number 8. Similarly, connect the positive terminal of the 10 microfarad capacitor to pin 6 and 7 and the negative terminal to pin1 of the IC. The next step is to connect a 100 k ohm resistor between the positive pin of the capacitor and pin 8 of the IC. Make the connections of the transistor pins with the IC such that the emitter pin of the transistor is connected to pin 1 of the IC and the collector pin is connected to pin 2. Complete the rest of the circuit by connecting the battery and microphone. Test the working of the project. This helps the user to know about the basic operation of electronic components, flow of electric current, voltage drop, etc.

Clap Switch
31. Rain Alarm
To make a rain alarm, first of all, gather the components such as a BC547 transistor, a buzzer, battery, battery clipper, PCB, LEDs, connecting wires, solder wire, soldering iron, wire clipper, and tweezers. Print the schematic diagram of the rain alarm circuit. Short the rows of the printed circuit board according to the schematic diagram. Connect the positive terminal of the buzzer to the emitter pin of the transistor with the help of solder wire. Solder the positive terminal of the LED to the negative pin of the buzzer. The next step is to connect a battery clipper between the collector pin of the transistor and the LED. The connection should be made in such a way that the negative wire of the battery clipper is attached to the negative terminal of the LED and the positive wire is connected to the collector pin of the transistor. The final step is to connect the printed circuit board with the collector and base pin of the transistor. To test the circuit, pour a few drops of water onto the PCB. The LED glows, and the buzzer makes an alarming sound. This project helps us know the working of buzzer and other electronic components.

Rain Alarm
32. Water Level Indicator
A water level indicator is a common gadget that is used in our daily life to keep the tank of water from overflowing. Interestingly, one can easily make it at home with the help of easily available components and materials. The basic equipment required to build a water level indicator includes BC547 transistors, 100 Ohm resistors, a battery, battery cap, PCB, switch, LEDs, and rainbow cable. The tools essential for its construction include a soldering iron, solder wire, wire clipper, and tweezers. Assemble and solder the electronic components on the printed circuit board according to the circuit diagram. It helps the user understand the working of a transistor, conduction of current, voltage drop, emission of light, and many more concepts.

Water Level Indicator
33. Gas Leakage Detector
A gas leakage detector is an expensive gadget available in the market that can be constructed at home easily with the help of basic electronic components. The components used in this particular project include a voltage regulator IC, a dual comparator IC, rectifier diodes, NPN transistor, resistors, pot, electrolyte capacitors, transformer, buzzer, LPG sensor, LCD display, and a two-pin connector terminal. The first step to making this particular project is to download the component layout and place it on the printed circuit board. Now, attach the components according to the layout. Use solder wire to fix the components in place. Make the circuit tracks properly and cut off the extra wires and terminals of the components. Make sure the circuit is as compact as possible. Place the project in the desired location and use a broken gas lighter to test the work. By making a gas leakage detector, the user would have a better understanding of the sensors, buzzers, and other electronic components.

Gas Leakage Detector
34. Light Tracking Robot
A light tracking robot typically follows the light radiation and moves in its direction. To make such a robotic vehicle, you require two wheels, one castor wheel, robotic vehicle chassis, light-dependent resistors, motor, soldering iron, soldering wire, glue gun, PCB, screws, and screwdriver. The first step to building a light-seeking robot is to assemble the electronic components on the printed circuit board as per the circuit diagram. The positive terminal of the battery is connected to one side of each of the light-dependent resistors. The leisure ends of the light-dependent resistors are connected to the motors. The leisure or the free terminals of the motors are connected to the negative terminal of the battery. Assemble the printed circuit board to the vehicle chassis. Fix the wheels to the motor shafts. Attach a castor wheel to the middle of the chassis to add balance to the structure of the robotic vehicle. Use a flashlight to test the working of the light-seeking robot. This particular project helps the user know about various electronic components, circuit connections, functioning of motor, and the working of light-dependent resistors.
Light Tracking Robot
35. Surprise Glitter Box
A surprise glitter package is a common physics project that one can easily make with the help of a motor, a battery, battery holder, cardboard box, alligator clips, glitter, glue, tape, limit switch, craft paper, and a pair of scissors. First of all, connect the battery to the motor by either twisting the wires together or with the help of alligator clips. For the basic operation of the surprise glitter box, a limit switch, also known as the lever switch, is used. A limit switch typically consists of three terminals, two of which form a connection that is normally open if the switch is pressed and gets closed when the lever is not pressed. The limit switch is required to be placed inside the box carefully in such a way that the lever is depressed when the box is closed to make sure that the motor does not work until the box opens. Now, take a piece of craft paper and cut it into the shape of a circle. Make a cut along the radius of the circle and fold it into a conical shape. Attach four paper cut-outs shaped like a rectangle folded at 90 degrees inside the cone at equal distances. Finally, fix the paper cone to the motor shaft with the help of a hot glue gun. Place the motor inside the cardboard box at an appropriate height. Pour glitter into the paper cone and close the lid. This particular project would help the user understand the functioning of the motor, working of a limit switch, rotatory motion, and various other concepts.

Surprise Glitter Box
36. Syringe Robotic Arm
For the construction of a hydraulic robot arm, you need a thick cardboard sheet, 8 syringes, a vinyl tube, toothpicks, glue, a knife, masking tape, and a pair of scissors. The first step is to cut the cardboard to form the structure of the robotic arm, the grip, and the base. Now, drill holes into the designated areas. Fix the parts of the robotic arm together with the help of toothpicks. Cover the edges of the cardboard with masking tape. Attach four syringes to the arm in such a way that there exists sufficient space for the joint to move. Use a cardboard piece and an old pen cap to build the rotating platform. Fix the vinyl tube in the places where the motion of the robotic hand and gripping of objects are desired. This helps the user understand the hydraulic conduction, pressure, and rotation.

Syringe Robotic Arm
37. LED Cube
A light-emitting diode cube is yet another interesting physics project that one can easily make at home. It typically requires a printed circuit board, resistors, LEDs, solder wire, Arduino Uno, bakelite sheet, cutter, pencil, drill machine, and connecting wires. Firstly, cut the bakelite sheet in the shape of a small square. Make a 3 x 3 grid on the face of the sheet and drill holes on the intersection points. Make a small loop at the negative or the cathode terminal of all the LEDs. Shorten the length of the LED terminals by cutting out the extra portion. Temporarily attach the LEDs inside the holes drilled on the bakelite sheet. Connect all the anode terminals of the LEDs together with the help of connecting wires and solder. Firmly push the LEDs outwards and remove the resultant structure of the LEDs joined together from the bakelite sheet. Make a few more such structures with similar dimensions and connections. Stack the structures on top of one another and fix them at equal distances. A cube of LEDs gets formed. Now, connect all the cathode terminals of the LEDs together. Connect the LED cube onto the PCB. Make a connection for the Arduino Uno adjacent to the LED cube. Connect one resistor to each layer of the LED cube. Now, connect the LED cube to the Arduino board. Write the program in the programming software and load it into the Arduino board. Turn on the power supply and test the working of the project. This project helps the user build an understanding of the electrical connections, programming, working of Arduino, and various electronic components.

LED Cube
38. Air Pump
The materials required to make an air pump include a plastic container, a knife, a pair of scissors, a balloon, and tape. The first step is to make a small hole in the cap of the plastic container. Make sure that the hole is situated right in the middle of the lid. Cut a small rectangular piece from a balloon. Cover the hole with the rectangular strip and tape two of its opposite ends. Properly glue the lid to the container, so that there exists no leakage. Poke a tiny hole on the surface of the plastic container. Wrap the balloon to be inflated on the cap, place a finger on the tiny hole, and start repeatedly pressing the container. The balloon gets inflated. By making an air pump, you would be able to understand the atmospheric pressure, the basic properties of matter, compression force, working of a valve, unidirectional flow of air, expansion and ability of elastic objects to change shape, etc.

Air Pump
39. Magnet
To make a magnet, you require a few iron nails and a magnet. Firstly, hold the magnet in a fixed position. Now, start rubbing the iron nail along the length of the magnet in a particular direction. Make sure that the direction of strokes provided to the magnet is fixed, i.e., either from North to South or from South to North ends of the magnet. Perform the strokes on the magnet about 45-50 times. Finally, bring the magnetized iron nail around a ferromagnetic substance. The nail and the substance get attracted towards each other. This helps the user understand the magnetic induction, magnetic behaviour of objects, and unidirectional alignment of the dipoles of an object.

Magnet
40. Windmill Working Model
A working windmill model is a common physics project that one can build with the help of easily available equipment such as cardboard, thermocol, glue, a pair of scissors, a motor, a battery, and a battery holder. The first step to making the working model of the windmill is to make the base structure of the windmill. For this purpose, fold the cardboard sheet in the shape of a cone and stick it on the top of thermocol sheet. Make sure the cone is properly glued and does not move. Now, make the wings of the windmill. Cut out four equal-sized wings from the cardboard sheet and pin them together on a small circular cardboard cut-out. Drill a small hole on the top of the cone along the curved surface a few centimetres below the top point. Connect the battery holder wires to the wires of the motor. Fix this arrangement of motor and battery holder on the conical base in such a way that the motor shaft easily passes through the hole. Glue the fan of the windmill to the shaft of the motor. Make sure the motor shaft and the fans rotate smoothly. Attach the battery and observe the working of the model. Decorate the surroundings of the model appropriately by placing the miniature cardboard models of objects present in a real windmill farm. This physics project allows the user to easily demonstrate the working of a windmill, generation of energy, working of motors, conduction of current, and transfer of energy.

Windmill Working Model
41. Automatic Street Light
An automatic street light glows when a vehicle is present nearby, and it shuts down when there is no traffic. The essential electronic components to form an automatic street light model include a transistor, LEDs, LDR, resistor, printed circuit board, battery holder, switch, and battery. The tools required for the construction include solder iron, solder wire, and wire stripper. First of all, solder the transistors onto the printed circuit board. Connect the emitter pin of both the transistors to the negative terminal of the battery holder. Now, connect the collector pin of transistor-1 to the base pin of transistor-2. Connect a resistor between the positive terminal of the battery and the collector pin of transistor-1. Finally, connect the light-dependent resistor between the base pin of transistor-1 and the positive terminal of the battery clip. Complete the rest of the circuit as per the circuit diagram. Connect a resistor between the base pin of transistor-1 and the negative terminal of the battery. Now, connect another resistor between the positive terminal of the battery and the anode pin of the LED. Finally, connect the cathode terminal of LED to the collector pin of transistor-2. Attach the circuit to a model of a street in such a way that the LDR has enough exposure and the LEDs are fixed in place. Verify the working of the project. It helps the user understand the working of light-dependent resistors, circuit connections, voltage drop, and the operation of the transistor as a switch.

Automatic Street Light
42. Electromagnetic Induction Model
To make a working model that displays electromagnetic induction in real life, you require an LED, a transistor, a resistance, a battery, tape, battery clip, and copper wire. The first step is to wrap the copper wire around a cylindrical object 40-50 times to form a thick metal coil. Follow the same procedure to make another coil. Make sure that the second coil consists of the same number of turns and a loop right in the middle, i.e., after 20 turns. Remove the insulation coating a few inches from the end of the wire. Take the first coil and connect the terminals of an LED to the coil terminals. Now, connect the middle pin of the transistor to a 15k resistor. Take the second coil that consists of a loop wire. Connect one end of the coil to the first pin of the transistor and the other end to the free end of the resistor. Connect a battery cap between the loop wire of the second coil and the third pin of the transistor. Make sure the positive terminal of the battery is connected to the loop wire, while the negative terminal is connected to the third pin of the transistor. Solder and fix the connections permanently. Fix the arrangement on a piece of hard cardboard. Use double-sided tape to vertically fix the battery and the coil on the top of the board. Attach the battery clip to the battery. Move the coil that is connected to the LED near the circuit. The LED glows, thereby verifying the existence of electromagnetic induction.

Electromagnetic Induction Model
43. Thermal Insulator
To make a thermal insulator at home, you need three glass jars, a woollen scarf, paper, aluminium foil, a pair of scissors, tape, hot water, fridge, thermometer, bubble wrap, and stopwatch. Cut a rectangular piece of aluminium sheet, paper, and bubble wrap. Each cut out should be long enough to wrap the glass jars about three times. Firstly, cover one of the jars with aluminium foil three times. Fix the end of the aluminium foil in place with the help of tape. Now, in a similar manner, wrap the bubble wrap and paper around the jar. Now, take another jar and wrap it completely in a woollen scarf. Leave the third jar unwrapped. Fill all the jars with hot water. Use a thermometer to note the initial temperature of the water. Close the lids of the jar and place the properly sealed jars in a refrigerator. Take out the jars after 10 minutes and note the final temperature of the water. Observe which of the jars provide the best thermal insulation. This simple project helps the user understand the concept of convection, thermal insulation, conduction, the correlation between the thickness of the insulation layer and temperature, and heat energy.

Thermal Insulator
44. Solar Panel
The essential materials required to make a solar panel include a printed circuit board, ferric chloride solution, solder, solder iron, alcohol, and crystal silicon paste. Draw the connections of the solar panel on the printed circuit board with the help of a marker. Pour ferric chloride solution into a container. Immerse the printed circuit board into the ferric chloride solution and perform the etching process. Place the container containing the printed circuit board in sunlight to speed up the process. Now, take out the printed circuit board and clean it with alcohol. Make connections on the board with the help of solder wire and soldering iron. Apply crystal silicon paste over the printed circuit board and leave it to dry. Remove the extra paste from the printed circuit board. Attach the connecting wires to form the positive and negative terminals of the solar panel. Place the set-up in direct sunlight and connect a multimeter across the terminals. Observe the voltage developed and confirm the working of the solar panel. By building this particular project, the user is able to understand the internal working of a solar panel and the conversion of light energy into electrical energy.

Solar Panel
45. Writing Machine
The essential materials required to build a writing machine are wooden blocks, glue gun, rubber bands, drill machine, stepper motor, iron rod, pencil, Arduino Uno, stepper motor driver, USB cable, laptop/PC, and metal gear servo. The first step is to cut out a rectangular piece from the wooden block. Now, cut two small rectangular pieces of wood having a length equal to the width of the main or base wooden block. Drill two holes about 3 cm away from the edge on both of the small rectangle-shaped wooden pieces. Stick one of the small rectangular wooden pieces on the edge of the base plate and the other block a few inches away from the other edge. Place the stepper motor on the base plate in such a way that the shaft of the motor easily passes through the hole of the small rectangular plate. Pass an iron rod through the hole of the block present on the edge of the base plate and connect another end of the rod to the motor shaft. Insert a pencil through the free holes of both the small rectangular blocks. Make a similar structure. Place it horizontally on the main structure and glue it in place. Attach the electronic components to the Arduino board and make the circuit. Provide power supply to Arduino Uno. Fix the pen in position. Adjust the height of the pen according to the paper. Connect the Arduino Uno board to a laptop or PC with the help of a USB cable and load the program. Finally, test the working of the project. This particular project helps the user know about the Arduino board, electrical circuits, programming, working of a stepper motor, linear motion, etc.

Writing Machine
46. Drone
A drone or a quadcopter is a prominent physics project one can build with easily available materials. The equipment and materials necessary to build a drone include metal/plastic/wooden sheets, motors, propellers, battery, RC receiver, electronic speed control, zip ties, connecting wires, screws, screwdriver, solder wire, wire stripper, and soldering iron. First of all, design the frame of the quadcopter. Now, drill holes into the frame and assemble the motors. Make sure that the shaft of the motors is able to rotate freely. Connect the electronic speed controllers to the base of the drone. Use zip ties to make sure the electronic speed controllers are properly fixed to the frame and do not fall off during the flight. The landing of the quadcopter is an essential phase, hence the landing gear is required to be positioned appropriately. Assemble the controller on the top of the drone and connect it to the remote control. Test the flight and landing of the device. This project would certainly help the user learn about air resistance, uplift force, aerodynamics, remote control operation, and rotatory motion.

Drone
47. Earthquake Alarm
The essential components required to build an earthquake alarm include a battery, battery cap, buzzer, safety pin, switch, cardboard sheet, nut and copper wire. The first step is to attach an inverted ‘L’ shaped cardboard cutout vertically in the middle of a cardboard sheet with the help of glue. Now, glue a safety pin in the middle of the ‘L’ shaped cardboard in a horizontal direction. Attach a nut to the end of a copper wire. Pass the wire through the loop of the safety pin and fix it on the top of the structure. Allow the nut to hang freely. Connect the buzzer to the switch, free end of the copper wire, and the battery clip. To test the working of the project, turn on the switch and lightly shake the structure. The buzzer starts to produce an alarming sound indicating the possibility of an earthquake. This project assists the person to learn about the reason behind the occurrence of an earthquake, seismic waves produced by the earth, seismometer, working of a buzzer, and connection of electronic components.
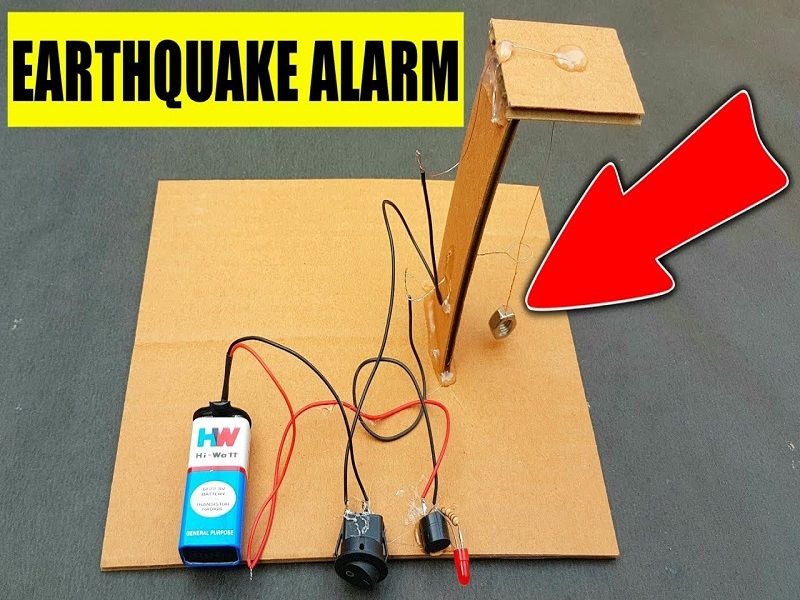
Earthquake Alarm
48. Water Dispenser
To make a water dispenser at home, you require a cardboard box, glue gun, knife, plastic bottle, vinyl tubing, and a container. The first step is to drill a hole on the curved surface of the plastic bottle, a few inches above the base. Now, insert the vinyl tube into the hole. Place the bottle into the cardboard box. Poke a small hole on the front side of the cardboard box. Pass the pipe connected to the bottle through the hole made on the cardboard box. Place a container in front of the cardboard box under the pipe. Pinch the end of the pipe and pour the liquid into the bottle. Close the lid of the bottle. Twist the cap in a clockwise direction and observe that the liquid gets poured into the container. By making a water dispenser, the user would be able to understand the basics of pressure, the flow of liquids, and the Brownian motion of water molecules.

Water Dispenser
49. Propeller LED Pendulum Clock
A propeller LED pendulum clock is yet another common Arduino based project. One can easily build it with the help of electronic components such as LEDs, resistors, a transistor, Arduino Nano, IR receiver sensor, connecting wires, hall sensor, switch, capacitors, battery, USB cable, magnet, DC motor, printed circuit board, etc., and tools such as solder wire, soldering iron, wire clipper, and tongs. First of all, arrange all LEDs on the printed circuit board in a straight line and solder them in place. Connect resistors to the LEDs. Now, make the rest of the connections as per the circuit diagram. Solder the female header connectors onto the printed circuit board. Attach the Arduino nano board to the electronic circuit. The cathode terminal of the LEDs is connected to the ground terminal of the Arduino board. Make sure the cathode terminals of all of the LEDs are shorted. Connect the resistors to the 5V pin of the Arduino board. Make appropriate connections between resistors and the analogue/digital pins of the Arduino Nano board. Connect switch and battery to the circuit. Attach the IR receiver to the board and fix it in place with the help of solder wire. Attach the ground pin of the IR receiver to the ground of the circuit. Now, connect a 100-ohm resistor to the VCC pin of the IR receiver and a 100 microfarad capacitor between the VCC and ground pin of the sensor. Fix one end of a connecting wire to the output pin of the IR receiver sensor and the other end to the receiver pin of the Arduino Nano. Solder the hall sensor to the printed circuit board. Connect VCC pin, ground pin, and output pin of the Hall sensor to 5V pin, ground pin, and D2 pin of the Arduino Nano board. Verify the circuit connections according to the circuit diagram. Drill a hole in the middle of the printed circuit board and attach the motor in such a way that the motor shaft easily passes through the hole and the board is free to rotate. Add balancing weight to one end of the board. Attach the Arduino Nano board to a laptop or PC with the help of a USB cable and load the code. Turn on the switch and bring a piece of a magnet near the hall sensor. Observe that the LEDs begin to glow. Now, fix the circuit on a wooden structure that has a small magnet fixed on one side. Test the working of the project. This particular project would help the user know about hall sensor, IR sensor, conversion of energy from one form to another, magnetic field, programming, Arduino Nano, circuit connections, voltage, voltage drop, and various other concepts.

Propeller LED Pendulum Clock
50. Data Transmission using Li-Fi
Li-Fi stands for Light fidelity. It is a technique that enables high-speed data transmission. To make a Li-Fi based data transmission system you require two broken pairs of wired earphones, wire stripper, solar panel, LED, resistor, battery clip, solder wire, soldering iron, and wire stripper. The first step is to cut and separate the connector of the earphones from the earbuds. Now, use a wire stripper to remove the insulation. You can observe that the earphone wire comprises four wires. One of the wires is the ground wire, while the rest three are for audio, right speaker, and left speaker. Clip the audio wire and join the speaker wires by twisting them together. Obtain two such arrangements. Connect the twisted wires to the positive terminal and the ground wire to the negative terminal of the solar panel. Take the other similar arrangement. Attach a battery clip to the speaker wire and a 220ohm resistor. Now, connect an LED between the ground wire and the free terminal of the resistor. Attach the battery to the battery clip. Insert the wire connected to the LED circuit into the earphone jack of a mobile phone and the wire connected to the solar panel to a speaker. Play a song on the mobile phone and observe the working of the circuit. This particular project helps the user learn about LI-FI technology and the transmission of data.

Data Transmission using Li-Fi
51. Ropeway Model
To make a ropeway model, the user requires a thick cardboard sheet, a pair of scissors, glue, tape, DC motors, and a rope or string. First of all cut four rectangle shape cardboard strips of equal dimensions. Attach a dc motor on one end of the rectangular strip. Cover the motor by forming a cuboid shape using cardboard around it. Form a closed electronic circuit by connecting a switch to the motor and a battery clip. Glue the switch and the battery on the top of the cuboid. Cut three circles out of the cardboard sheet, neatly stack them, and glue them together in place. Make sure that the circle present in the middle has a smaller diameter than the diameter of the two circles present on the boundary. Drill a hole in the middle of the three circles and fix it over the motor shaft. Make another cuboid box and circles with the help of cardboard having the same dimensions as the previous ones. Place both the cuboids opposite to each other and properly glue them in place. Make sure the height of the circles present on the top of the cuboids is the same. Wrap a string around the inner circle of both structures. The string should have a sufficient amount of tension in it. Attach two small cardboard boxes to the string and turn on the switch. The motor begins to rotate the shaft. The shaft transfers rotatory motion to the circular structure, which in turn causes the string to move. This particular project is helpful as it explains various physics-related concepts such as the working of a motor, transfer of momentum, inertia, rotary motion, and tension.

Ropeway Model
52. Hand Water Pump
To make a hand water pump at home, you need a 60ml syringe, a 5ml syringe, copper tubes (5mm and 8mm), iron strips, foam valve for water pumps, bearing balls, iron nail, washer, plier, drill machine, cutter, nut bolts, and a plastic container. The first step is to remove the plunger from the syringe. Now, cut the foam valve in the shape of a circle that has a diameter equal to that of the barrel. Put the foam valve into the empty barrel of the syringe. Make sure that the valve is able to move up and down with ease. Now, remove the rubber part attached to the plunger and replace it with the valve. Now, drill two holes located opposite to each other on the top of the plunger rod. Cut the plunger into two halves. Take a copper rod and compress its ends with the help of a plier. Now, drill a small hole on one end of the copper rod and two holes on the other end of the rod. Attach the rod to the plunger by drilling holes and inserting nuts and bolts through the holes present on the copper rod and the plunger. Take a metal strip and wrap it around the curved surface of the syringe barrel. Leave a few inches on both the ends of the metal strip. Align the ends of the metal strip along a straight imaginary line and drill two holes through them. The next step is to take two pieces of metal strip, fold them along the length, and drill a hole at both ends of each metal strip. Use a grinder to curve the shape of the ends of the metal strips. Attach the curved metal strip to the surface of the syringe barrel and fix it in place with the help of nuts and bolts. Make a small hole in the top corner of the syringe barrel. Take a 5ml syringe and remove its plunger rod. Cut the front portion of the barrel and glue it over the hole made on the curved surface of the 60ml syringe barrel. Now, take another copper tube. Make a hole on the end of the tube and another hole a few inches away from the same end. Take the middle portion of the foam valve and cut it in such a way that you have two circles. Insert a washer in between both the circles and pass an iron nail through the arrangement. Place it into the 60ml syringe barrel. Now, insert the plunger that contains the foam valve and is connected to the iron rod into the 60ml syringe barrel. Drop a bearing over the plunger. Seal the top of the barrel with the help of a circular plastic cut out. Attach the two metal strips and the copper rods together with the help of nuts and bolts. Use another nut and bolt to fix the curved rectangle shape metal strip to the copper rod. Pour water into the plastic container and dip the hand pump into it. Fix the handpump over the lid of the container with the help of a hot glue gun. Test the working of the project. This particular project would help the user understand the fluid mechanics, pressure, positive displacement principle, kinetic energy, mechanical energy, movement of fluids from a region of high pressure to a region of low pressure, etc.

Hand Water Pump
53. Bubble Machine
A bubble machine is yet another example of a simple physics project. To make a bubble machine at home, you require a plastic tube, a pair of scissors, plastic straws, a marker, tape, bottle cap, DC motors, battery, battery holder, propeller, USB, USB charger, electrical tape, and cardboard box. First of all, use a marker to make markings on the plastic tube. Make sure the markings are located at equal distances from each other. Now cut the tube along the marks to obtain congruent hollow cylindrical pieces. In a similar manner, cut the straws and obtain equal length hollow cylindrical pieces. Attach the straw pieces to each other in the shape of a star. Now, attach the plastic tube pieces to the end of the straw pieces arranged in the form of a star. Glue a bottle cap to the centre of the star-shaped pattern to form the bubble wheel. Take a DC motor and connect it to a battery holder. Fix the motor shaft to the bottle cap. The next step is to take a propeller and cut it into the desired size. Take another DC motor. Connect the motor to a USB charger. Attach the propeller to the motor shaft. Fix the motor on a cardboard box. Form the soap solution by dissolving shampoo, liquid dish wash, or liquid handwash into water. Pour this soap solution into a plastic container. Fix the motors on the lid of a plastic container. Make sure the motor connected to the plastic straw and tubes is fixed over the lid of the plastic container in such a way that the star pattern is properly immersed into the liquid present inside the container and is able to move easily. The propeller should be placed in such a way that the air circulated by the propeller directly passes through the plastic tube pieces. Check the motor connections and place an electrical tape over the joints. Turn on the power supply and test the working of the project. This helps the user understand the working of motors, propellers, circulation of air, surface tension, formation of bubbles, and the reason behind the tendency of the bubbles to maintain a spherical shape.

Bubble Machine
Seriously these are very nice projects. It is very helpful to do our project homework. These are very brilliant idea and some of them are also hard but they are very good.
THESE PROJECTS ARE GOOD , EASY AND HELPFUL
I CAN ONLY IMAGINE WHAT I WAS GOING TO DO WITHOUT THESE BRILLIANT IDEAS THNX ALOT BUT ANYWAYS THEY ARE VERY HARD NUTS TO CRACK.
Cool projects
These are very nice projects. Can any one state to me what is used to design the circuits?